Integrating with Connectwise Manage
CloudPanel has the ability to integrate with Connectwise which will make billing easier and more efficient. Each mailbox plan in CloudPanel will map to an existing product that you have stored in Connectwise and those products will be used as product additions in agreements under each company. Below you will find the information needed to setup CloudPanel to work with Connectwise.
¶ Create Connectwise API Member
The API member you create does not count against your user licenses and is used for CloudPanel to connect and communicate with Connectwise. You will need to configure this new member so it will have access to all the companies that you plan to have in CloudPanel. If the API member does not have access to a company, then CloudPanel cannot sync to it.
Create API Member
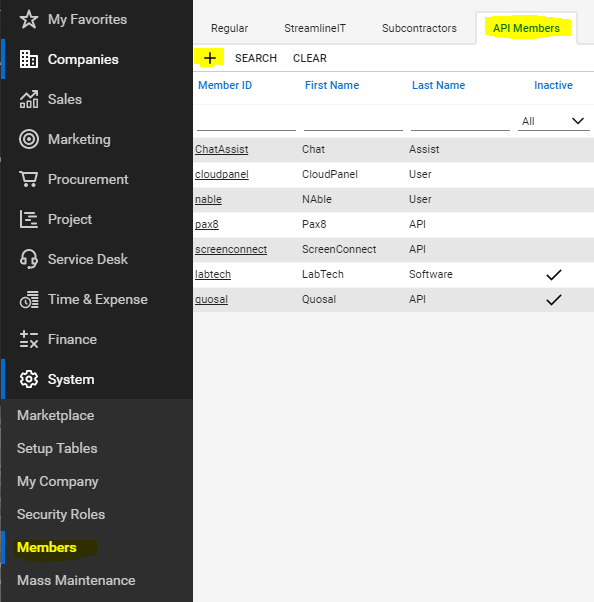
- Click on the System tab, click Members, select API Members tab, and then click the plus button to add new
- Fill in the information for your environment and make sure this member has access to the companies and the ability to modify product additions under agreements. Click save.
- Select the API Keys tab while you are in the new member you just created and click the plus button to add new
- Populate the description field and press save. This will generate a Public Key and a Private Key that you will need for CloudPanel. Make sure you save the Private Key somewhere safe because Connectwise will not let you view it again.
¶ Setup Products
If you are not aware of how agreements work in Connectwise, then not to worry. Connectwise uses agreements under each company to control how to bill your customers, when to bill your customers, and even how much to bill your customers. Under each agreement you can add product additions which are products that you create in Connectwise. These products include a name, description, quantity, cost and price which CloudPanel will use to adjust your figures automatically.
Create Product
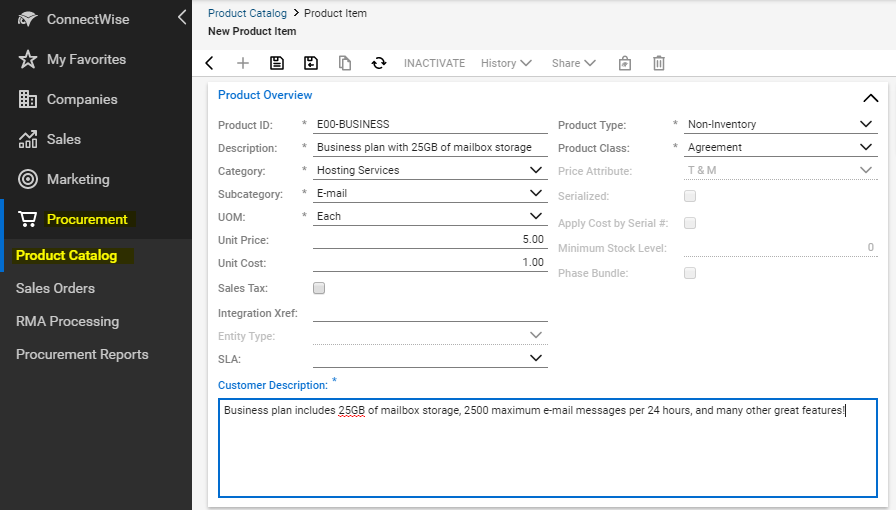
- Click on the Procurement tab, select Product Catalog, then click the plus sign to create a new product. Note: If you have existing products then you can skip this section
- Enter a product id, description, cost, price, and customer description. The customer description will appear on the invoice.
- Set the product class to “Agreement”
- Save the product and repeat these steps for additional products to match your mailbox plans in CloudPanel
¶ Configure Connectwise Agreements
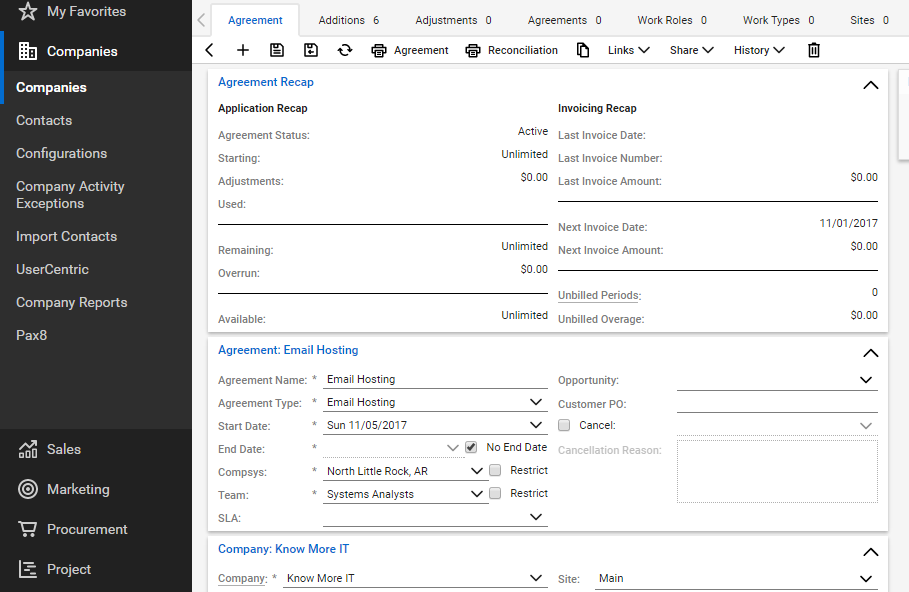
Setup new or configure an existing agreement that matches the contract you have with the customer. The agreement section will contain information such as the agreement name, start and end date (or no end date), as well as finance information such as taxes and the billing cycle.
- Click on Companies, select Companies
- Find the company you wish to add or modify the agreement, and click on the company’s name
- Click on Agreement tab, click plus button for adding a new agreement (if you are adding). Note: You do not have to add the product additions because CloudPanel can automatically do this for you.
¶ Configure CloudPanel
CloudPanel will need some information on how to connect to your Connectwise server, including the public and private key you generated earlier. Go to the CloudPanel setup page and choose Integrations.
- Url: Enter the URL of your Connectwise server. Make sure to include https:// at the beginning.
- Company Id: The company id field is unique to Connectwise and identifies the company you are logging into.
- Public Key: The unique public key that you generated earlier for the API member
- Private Key: The unique private key that you generated earlier for the API member
¶ Connect Mailbox Plans
You now need to associate each mailbox plan that you use to a product that you have created in ConnectWise.
- Select Integrations -> Connectwise -> Map Mailbox Plans
- The page will list each mailbox plan and allow you to search & associate that mailbox plan to a Connectwise product.
There are a couple of things to note:
- The cost and price from Connectwise will be synced with the mailbox plan in CloudPanel.
- You do not have to associate all mailbox plans. You can select only the plans you want to sync.
Warning!
You must have a separate Connectwise product for each mailbox plan in CloudPanel. If you map the same Connectwise Product to multiple plans then the quantities CloudPanel sync’s to Connectwise additions will be invalid.
¶ Connect Agreements
You are now ready to associate agreements to each company:
- Go to a company in CloudPanel
- Select Accounting -> Connectwise -> Connect Agreement
- First, search for the Connectwise company in the first select box
- After you select the Connectwise company it should populate all the agreements you currently have for that company in Connectwise. Select the email hosting agreement you created
- Click save.
- Click Update Now to test syncing
¶ Final
Now that you have associated an agreement with a CloudPanel customer, the syncing will start based on the interval you have setup in the setup page of CloudPanel. This interval tells the CloudPanel service how often it should sync all agreements in Connectwise.
What happens when a sync occurs?
- CloudPanel Service will search for all the agreements selected in the database. If you change an agreement (like delete one and create a new one) then you must update CloudPanel
- It will look through each mailbox plan that is associated with a product in Connectwise
- The CloudPanel service will update the quantity of users associated with that mailbox plan in the product additions under that agreement. If the product addition doesn’t exist under the agreement then CloudPanel will add it for you and use the cost/price from the mailbox plan in CloudPanel.
Note
If you set a custom price for the mailbox plan in CloudPanel, then it will use that price instead of the price set on the mailbox plan. Also if you update the discounts for a specific company in CloudPanel, it will update the price for that addition in Connectwise. Each time the CloudPanel service syncs with Connectwise, it will sync the price and cost in order to make both CloudPanel and Connectwise always in sync.